I am going to begin to move on to actually painting these trees we have been
dissecting. I use the word
dissecting because what I have been writing about is tree anatomy. In the comments we have discussed a book written in the early 20
th century by an artist named Rex
Vicat Cole called "The Artistic Anatomy of Trees". I learned a lot there, if there were a bibliography for this series of posts, Cole would be at the top. It is not easily read though and goes into a lot of detail that is extraneous.
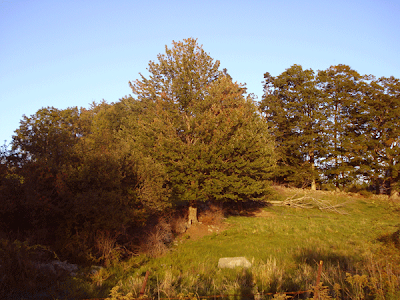
Here is a grouping of trees that we might set up to paint. Below is the same group of trees with the general lines indicated.
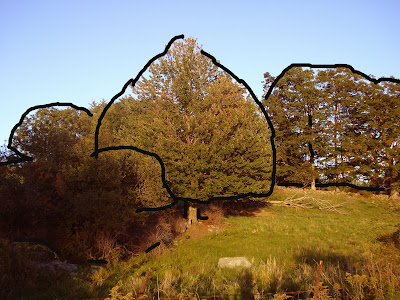
In order
to get this scene onto my canvas I would draw their outlines something like this. There are about five big shapes there. One of the reasons this scene is
attractive is because each of those areas is a
different size and shape. As the artist trying to get the picture up and running I need to plan out the simplest "blueprint" of my shapes I can. Now,I drew these lines on the picture with
photoshop, which is for me a pretty clumsy affair. If I were working in paint on canvas the lines would be softer. Theses lines look a little like coat hangers, but I think you get the idea. This is a summary, here's another.
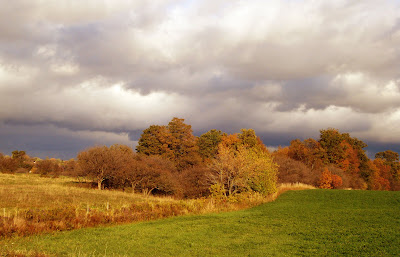
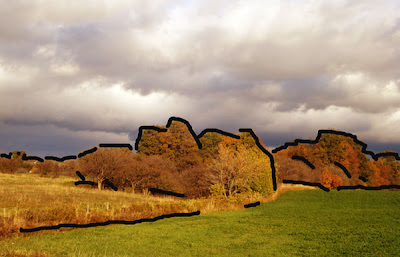
Above is the scene and below are the summary lines that
would start a block in of the painting. These lines are merely the greatest simplification of where the landscape is and carry the least amount of detail. The details of the edges of the forms are averaged or rounded off. However if you can get this much information onto your
canvas you are well on your way to "taming" a scene like this.
Below is the same photo with a few more lines on it. They show the larger " hidden" lines in the forms. You want to look for these and lightly indicate them.
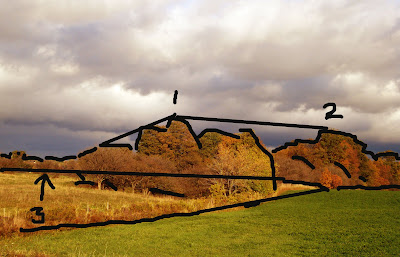
Notice the relationship between 1 and 2,
by finding that line between the two and checking
its angle you find a lot about about their placement. Look at
line 3, see what happens if you imagine it running behind that central group of trees and emerging on the other side. Notice where it would intersect that foreground diagonal were that extended. These continuation of existing lines show relationships between different objects in the scene. Look for them. It is a helpful way to avoid working piecemeal, which is where you have everything on the canvas, but not in its right relationship to everything else. This is a geometric measuring system.
 I want to show you a couple of great tree painters so that you can look at the restrained and simplified way each of them approached the sky hole problem. The painting above is by John Constable, courtesy of the artrenewal.org. Look at how "big" he kept the shapes in those trees. The sky holes are kept to a minimum and the large forms are dominant over them.When you see it done, it seems no big deal, but when you are confronted in nature by a tree with dozens of holes in it, some hard decisions have to be made.
 The next painting is a Corot, look how few sky holes he used, just a handful, and they are carefully placed to both look random and to reveal the shape of the tree. Notice how airy those trees are, their wispy handling makes them look ephemeral. Their beauty is in their delicacy.
 Here is more delicacy., this John Carlson is full of soft passages and artfully arranged shapes. The top third of this painting is an arrangement of unique and interesting shapes. These were designed carefully to be both random looking and to carry a concealed rhythmic geometry. Notice how differently each of these painters has handled the similar problems in their paintings.


 Posts
Posts

